Get Started
Set up your demand partner
To start using Relay, you will need to have a commercial agreement with a demand partner(s).
Once you have this agreement signed, you will need access to their UI and will need to set up a test campaign. In this tutorial and your testing of Relay, you’ll be sending requests targeting this test campaign.
If you are a publisher, you will need to set up Ads.txt files (example here). If you are reselling publisher inventory, you will need a sellers.json file (example here) under your domain, and each publisher will need an ads.txt file that lists you as an approved seller.
Create an Advertiser
Once your solutions architect has enabled Relay access, your first step is to create an Advertiser, who will represent your demand partner.
First, navigate to the Advertisers page and click “Create Advertiser”, which will open a modal where you can classify this “Advertiser” as a demand partner and give them a name.
To do this, select “Real Time Bidding (RTB)”. Under the “RTB Partner” dropdown, select your demand partner. If your desired partner does not appear, please contact your solutions architect who can enable this for you. For our tutorial, we will select Index Exchange.
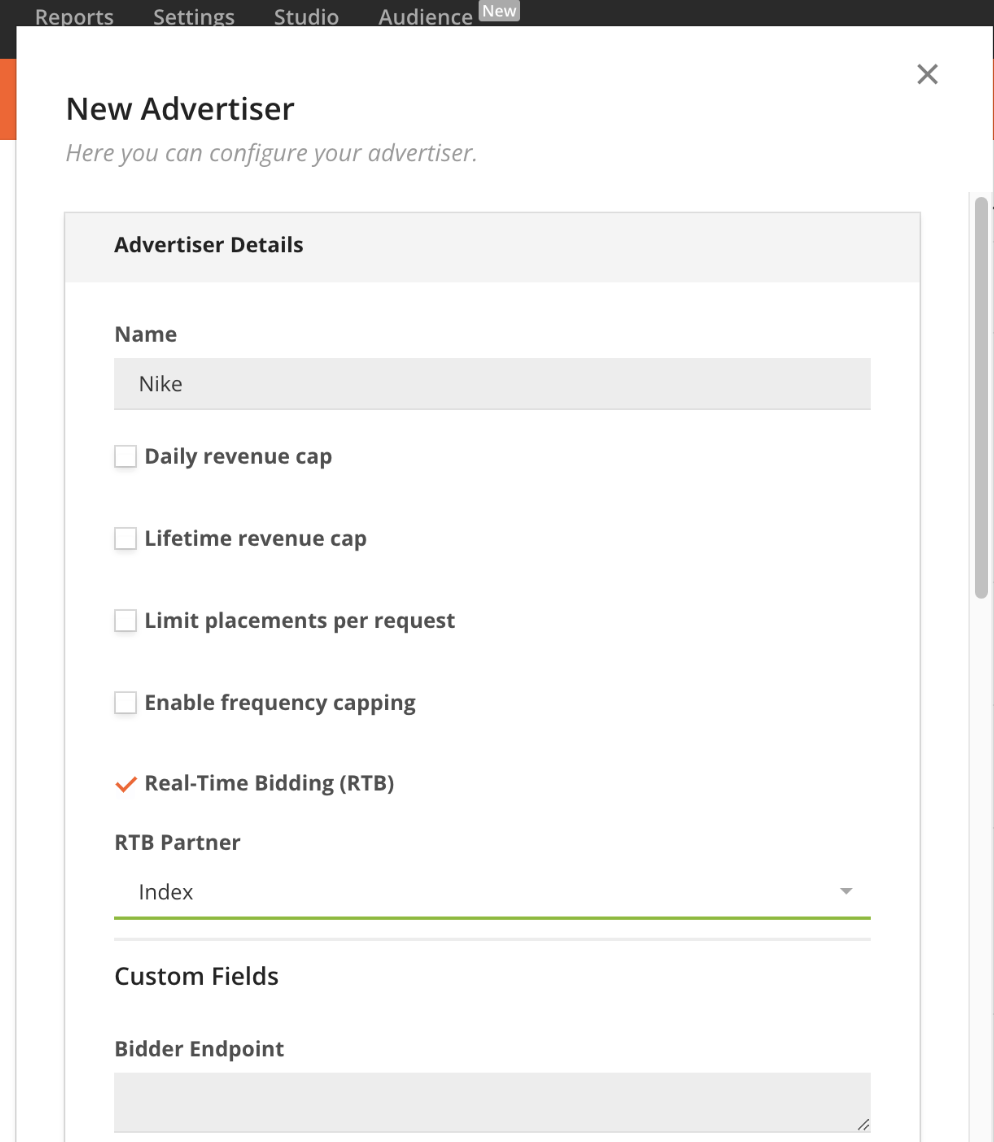
Under this Advertiser/Demand Partner, you will store the data and configuration that will be applied to all ad slots running through this partner.
Which demand partner you use will determine what fields and configuration need to be included here. For a full list of Relay demand partners and their required data, refer to our guide.
Here are some common fields that you might configure under the Advertiser:
- Bidder Endpoint
- API Key/API login details
- Bid floor (optional)
- Auction timeout (optional)
Create a campaign and flight
Once you have created your Advertiser, you will then need to create a Campaign.
Under the campaign, you only need to enter a name, and click Save.
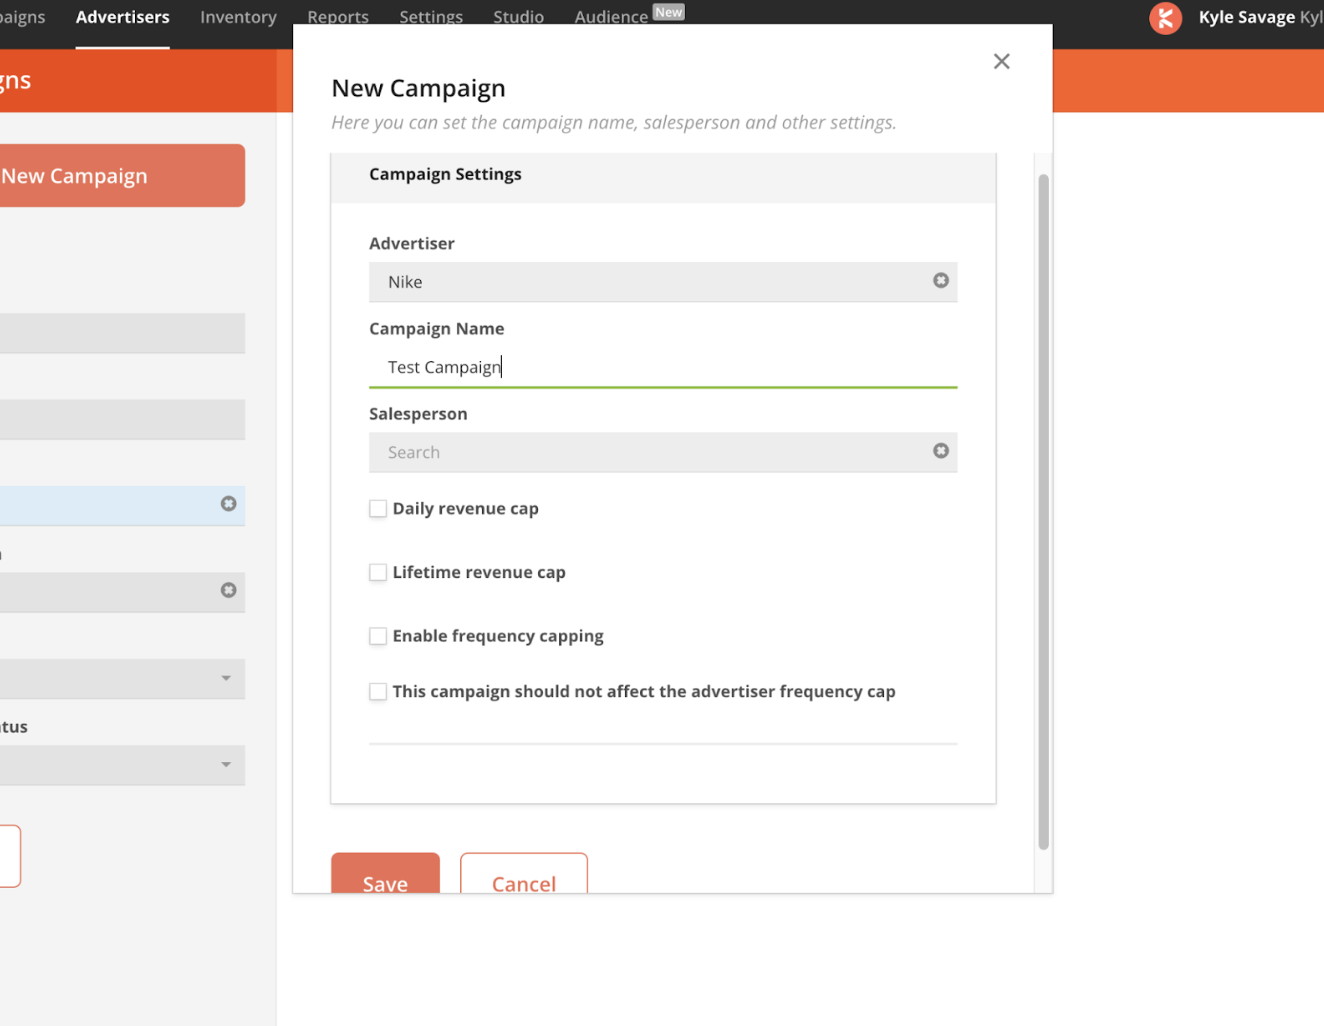
Once the campaign has been created, you will need to add a flight to it.
Under the flight, you will need to assign a Priority. This Priority determines how this demand partner will compete or co-exist with your other demand set up inside of Kevel.
To set up a clean testing environment, you should ensure that 1 decision request will always trigger 1 RTB request. You can do this by creating a separate Channel, Site, and Priority that is the highest in your waterfall.
You won’t need to enter any price for the flight, as the price will come dynamically from the RTB partner’s bid.
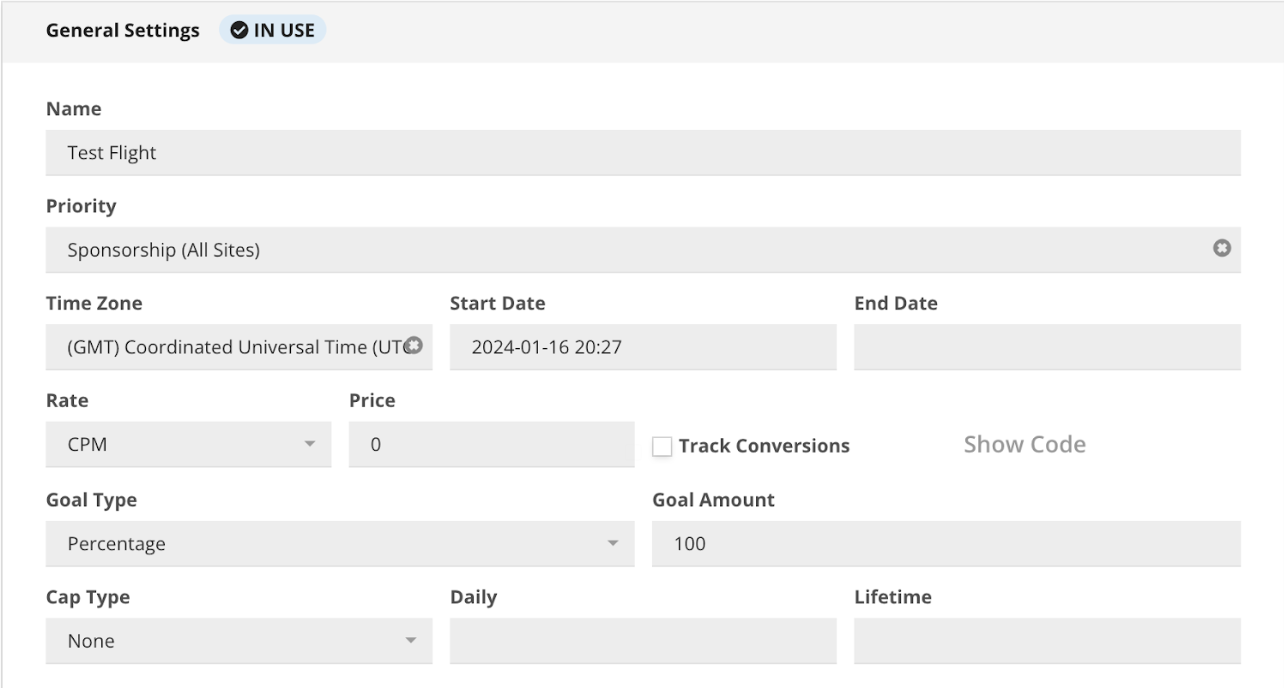
If you are setting up a Programmatic Guaranteed deal, you will want to set a Goal that corresponds to your deal with that Advertiser
Create an Ad
Now, you will create an Ad for all of your programmatic ad slots you are selling to this demand partner. Any data or configuration stored in this section will only apply to this ad unit.
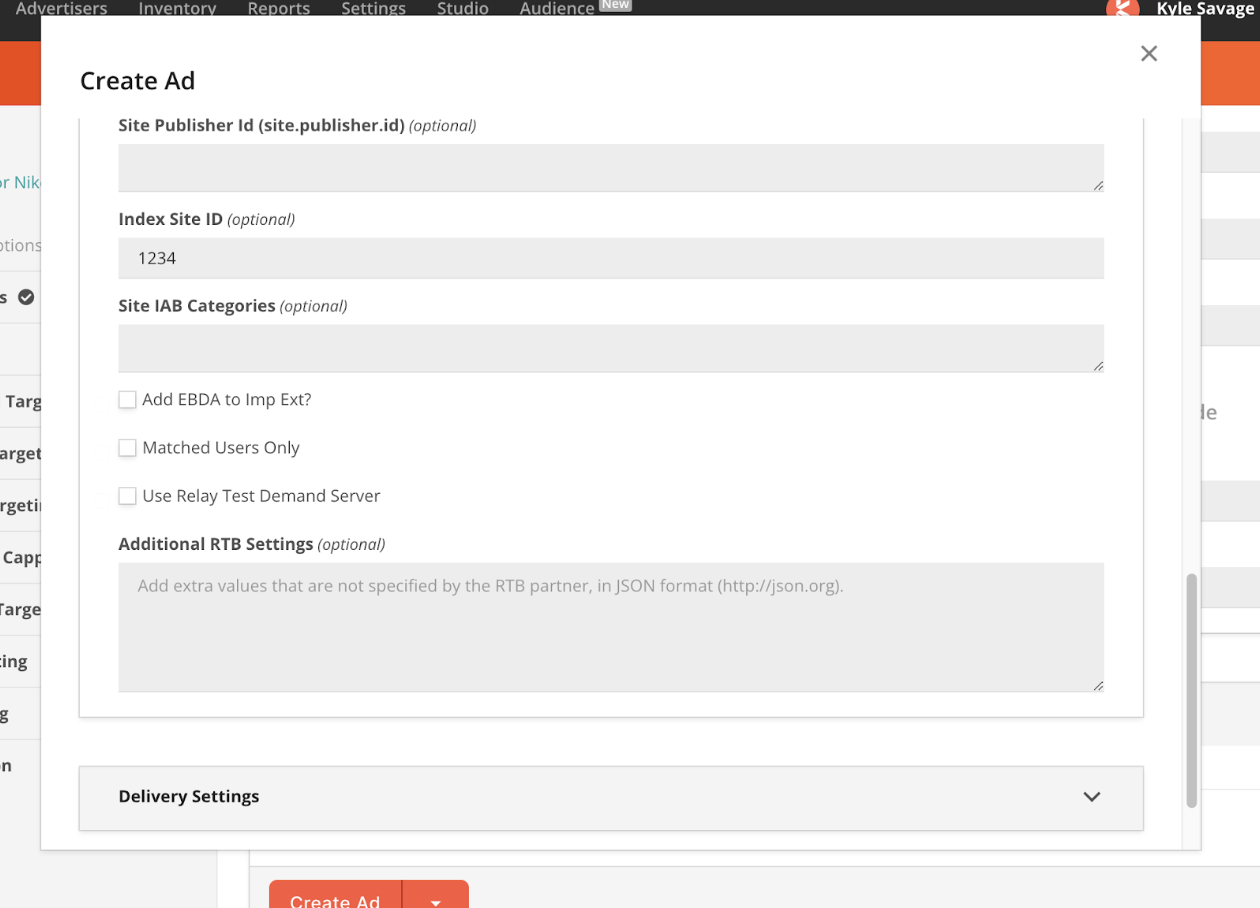
First, click “Create Ad”. This will launch a modal where you can enter in the name of your ad placement and the corresponding Ad Size.
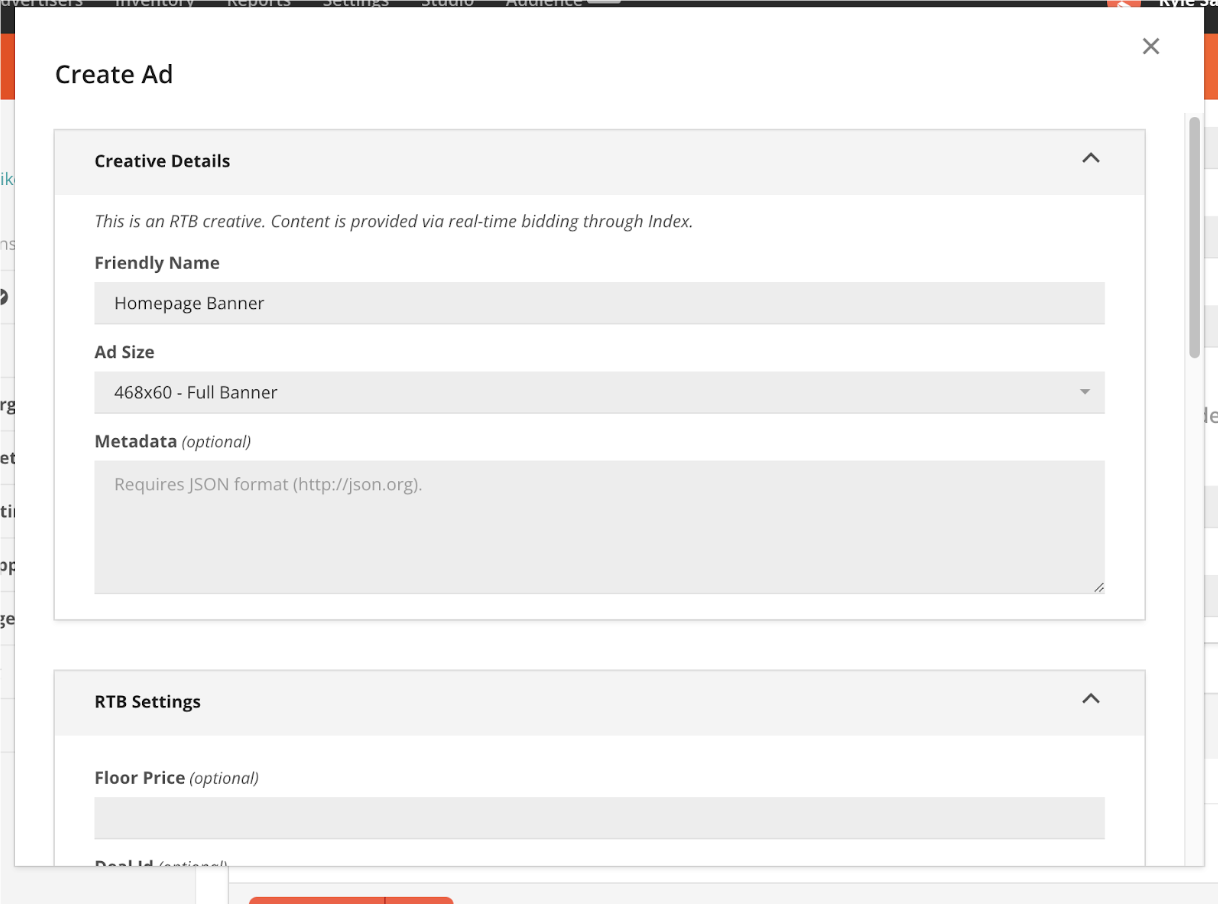
Next, scroll down to the “RTB Settings” box, below the “Creative Details” section.
Each demand partner will require different information to be stored under your Ad. For a full list of each demand partner and their required fields, refer to our guide. However, there are several universal fields you may want to configure here:
- DealID (optional)
- Bid Floor (optional)
For Index Exchange, we will need to add the SiteID, as shown below. Any demand partner specific values should be provided from your demand partner’s UI or your account representative there.
We are now done with the configuration inside of Kevel’s UI. Next, we will start sending requests targeting this demand partner to ensure the configuration is set up correctly.
Note: If the exact same field is set on the Advertiser RTB Settings and the Ad RTB Settings, then Kevel will consider the value on the Ad the final value.
Send an Ad Decision Request
When sending your decision request, you’ll need to have a Placement in the Placements array with the following fields:
- divName
- networkID
- siteID
- adTypes
There are some other non-required fields that you may want to include as a best practice:
- IP address
- URL
- UserID (if user sync is enabled)
- User agent (in request header)
All other fields (ex: PMP Deal ID, Geo, etc) are automatically derived from configured Advertiser and Ad Custom fields as well as contextual data on the request.
Additionally, if required, User Matching with the SSPs can be achieved, and is documented here: https://dev.kevel.com/docs/user-matching
Now, you will need to construct a Decision Request that targets your network, placement, and site within Kevel. If you aren’t familiar, here is a link to documentation on how to construct a Decision Request (link).
Here is an example below:
{
  "placements": [
	{
  		"divName": "main",
  		"networkId": 1,
  		"siteId": 122333,
  		"adTypes": [5]
	}
  ],
  "user": {
	"key": "u-123"
  },
  "consent": {
	"gdpr": false
  },
  "ip": "1.1.1.1",
  "url": "https://myurl.com"
}
Additional RTB Settings
In order to better classify your inventory for advertisers, your demand partner may advise that you share additional fields and context from the Open RTB spec.
If you need to do this, please reference the guide Additional RTB Settings and reach out to your solutions architect with any questions.
Updated about 1 month ago
Next, you should read through the demand partner specific fields to see what data is required for your selected partner